A loose or fallen rearview mirror is more than just an annoyance; it’s a significant safety hazard. A secure, stable mirror is crucial for maintaining visibility and ensuring a safe driving experience. Attempting a repair with the wrong adhesive can lead to a messy failure and potential damage to your windshield.
Choosing the right product for the job is essential for a permanent, vibration-resistant bond that will last for years. This roundup compiles the best adhesives on the market, from trusted professional-grade kits to versatile alternatives, to help you restore your mirror’s security with confidence and get back on the road safely.
The Best Rear View Mirror Adhesives for a Secure Fix
- Permatex 81840 Extreme Rearview Mirror Professional Strength Adhesive Kit
- Visbella Rearview Mirror Adhesive Repair Kit for Windshield Excellent Bonding
- 3M High-Bond Rearview Mirror Adhesive, 08749, 0.02 fl oz
- Permatex Rearview Mirror Adhesive, Adhesive .3ml/Primer .6ml (81844)
- Loctite 37438 Rearview Mirror Adhesive Kit – 0.3 cc
- NOCO GENIUS1: 1A 6V/12V Smart Battery Charger & Maintainer
- 3M 03614 Scotch-Mount 1/2″ x 15′ Molding Tape (2-Rolls)
- Permatex 09001 Clear Rear View Mirror Adhesive
- Loctite PL 375 VOC 5 fl oz Premium Construction Adhesive
Permatex 81840 Extreme Rearview Mirror Professional Strength Adhesive Kit

For a professional-grade result, the Permatex 81840 kit is a top choice. Its two-part system includes an activator and an adhesive, ensuring a powerful, lasting bond specifically engineered for rearview mirrors. This professional strength formula is built to withstand the constant vibrations and temperature changes experienced while driving.
The kit is designed for a clean and accurate application. It features a medical-grade towelette for preparing the mounting surface, which helps minimize mess and improves the overall precision of your repair. This attention to detail makes it a reliable option for a permanent fix.
Visbella Rearview Mirror Adhesive Repair Kit

The Visbella kit offers a strong and versatile solution for a detached mirror. It boasts exceptional strength that surpasses traditional epoxy resins, creating a secure bond between the mirror and windshield. Its rapid repair functionality means you can complete the fix quickly, reducing downtime and inconvenience.
Beyond just rearview mirrors, this adhesive is useful for a variety of other bonding tasks. It can effectively bond metal to metal, glass to glass, and glass to metal, making it a handy product to have in your garage for other small repairs on ceramics or jewelry.
3M High-Bond Rearview Mirror Adhesive

3M is a leader in adhesives, and their High-Bond Rearview Mirror Adhesive lives up to the reputation. This two-part structural acrylic system is specifically designed for mounting rearview mirrors. It creates a durable bond that holds up well in demanding conditions, including high temperatures and humid environments.
The adhesive is formulated to be resistant to moisture, chemicals, vibration, and impact. This robust performance ensures that once your mirror is attached, it will stay firmly in place through various driving conditions, providing long-term reliability.
Permatex Rearview Mirror Adhesive (81844)

This Permatex 81844 kit provides a straightforward and effective solution for reattaching your rearview mirror. It includes both the adhesive and primer necessary for a strong, permanent bond on windshield glass. The compact package contains everything you need in a single, convenient unit.
Designed for ease of use, this kit helps ensure a proper application for a reliable hold. It’s a trusted option from a well-known brand in automotive chemicals, giving you confidence in the quality and performance of the repair.
Loctite 37438 Rearview Mirror Adhesive Kit

Loctite is synonymous with strong adhesives, and the 37438 kit delivers OEM-approved performance. This means it meets the specifications of original equipment manufacturers, making it a product trusted by professionals and leading auto makers worldwide for a reliable bond.
A key benefit of this adhesive is its fast handling strength. It is ideal for metal mirror feet, achieving handling strength in just seconds and full mirror-mounting strength in approximately 15 minutes. This allows you to complete your repair quickly and get back to driving with a secure mirror.
NOCO GENIUS1 Smart Battery Charger
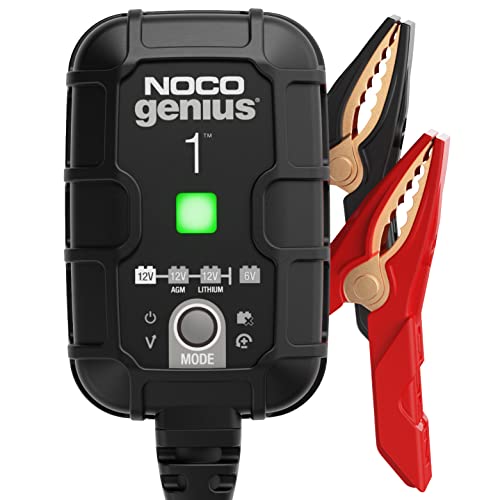
While not an adhesive, a reliable battery charger is an essential tool for any car owner. The NOCO GENIUS1 is a compact yet powerful all-in-one solution, functioning as a battery charger, maintainer, and trickle charger. It is compatible with both 6V and 12V lead-acid and lithium-ion batteries.
This smart charger features precision charging with an integrated thermal sensor. It dynamically adjusts the charge based on ambient temperature to prevent overcharging in hot weather and undercharging in cold, ensuring optimal battery health and longevity for your vehicle.
3M Scotch-Mount Molding Tape

For certain mirror types or as a temporary hold, a high-strength double-sided tape can be a viable alternative. The 3M Scotch-Mount tape offers automotive-grade strength, designed to permanently attach moldings, trim, and emblems to vehicle surfaces with a weather-resistant hold.
This versatile tape bonds securely to various materials like painted metal, plastic, and carbon fiber. It is resistant to water, heat, and vibration, ensuring it holds tight through car washes, rain, and temperature swings, making it a durable option for various automotive applications.
Permatex 09001 Clear Rear View Mirror Adhesive
If you prefer a clear adhesive that dries transparent, the Permatex 09001 is an excellent option. This formulation is designed to provide a strong, lasting bond for rearview mirrors without leaving a visible residue or discoloration on the mounting area. It ensures a clean, professional-looking repair.
This adhesive is engineered to withstand the stresses of daily driving, including vibrations and impacts. Its clear finish makes it a good choice for situations where the bond line might be slightly visible, maintaining the aesthetic appearance of your mirror installation.
Loctite PL 375 Premium Construction Adhesive
For those seeking a heavy-duty, multi-purpose adhesive that can also handle automotive tasks, Loctite PL 375 is a strong contender. This premium construction adhesive is known for its high strength and versatility, capable of bonding a wide range of materials including glass, metal, and plastic.
While not specifically marketed for rearview mirrors, its robust formula and weather-resistant properties make it a potential option for a powerful, permanent bond. It is important to ensure compatibility with automotive glass and to use it carefully due to its high strength and potential for a permanent hold.
Buying Guide: How to Choose the Right Adhesive for Your Rear View Mirror
Choosing the right adhesive for a rear view mirror installation isn’t just about sticking something to glass. I’ve learned that getting it wrong means a wobbly mirror or, worse, a loud thud on your dashboard a week later. The goal is a permanent, rock-solid bond that withstands temperature swings and daily vibrations. Let’s break down what I look for when picking the best adhesives for rear view mirror installation 2025.
First and foremost, I always check the bonding strength and intended surface. Most modern car windshields have a special, often shaded, frit band where the mirror mounts. This isn’t smooth glass, and not all adhesives grip it well. I specifically look for products labeled for automotive glass and mirror attachment. Some powerful general-purpose adhesives can work, but I prefer ones designed for this exact job because they account for the slight flex in the windshield.
Next, I pay close attention to the formula type. The two main categories I see are primers and primerless adhesives. Traditional systems involve applying a primer to the windshield and the mirror button first. This primer chemically etches the surface, creating an incredibly strong bond with the adhesive. It’s often considered the professional, most durable method. However, primerless kits have become hugely popular, and for good reason. They combine the adhesive and priming agent into one tube, simplifying the process immensely and reducing the chance of user error. For a DIY job, a high-quality primerless adhesive is often my go-to for its balance of strength and simplicity.
Setting time and temperature resistance are also critical. I read the product specs to see how long it takes for the adhesive to set enough to hold the mirror’s weight (initial tack) and how long until it reaches full cure strength. I never hang the mirror before the recommended tack-free time. Furthermore, my car faces everything from freezing winters to blazing summer sun. A good adhesive must have a wide operating temperature range, typically from -40°F to over 180°F, to prevent softening or becoming brittle.
Finally, I consider the application. Is it a single-use tube or a multi-use syringe? For a one-time job, a single-use tube is convenient and ensures the adhesive is fresh. If I’m helping friends or family and might need it again, a syringe-style applicator that can be sealed is more economical. I also look at the nozzle size for precise application, as a big glob of adhesive looks messy and can interfere with the mirror housing. By focusing on these factors—surface compatibility, formula type, cure time, and application method—I can confidently select an adhesive that will keep my mirror securely in place for years to come.
FAQ
Why did my rear view mirror fall off, and how can I prevent it from happening again?
This usually happens for one of three reasons. The most common is that the original adhesive failed due to age, extreme temperature cycles, or an improper initial installation. Second, the windshield or mirror button wasn’t cleaned thoroughly enough before re-gluing, leaving oils or residue that broke the bond. Third, the mirror was bumped or adjusted before the adhesive had fully cured. To prevent a repeat, I meticulously clean both surfaces with isopropyl alcohol, choose a high-strength adhesive designed for automotive glass, and follow the cure time instructions to the letter, resisting the urge to touch it.
What is the difference between a primer and a primerless adhesive system?
A primer is a separate liquid chemical that you apply to the glass and mirror button before the adhesive. Its job is to microscopically rough up and chemically prepare the surfaces, creating a much stronger bond with the adhesive. A primerless system has the priming agents mixed directly into the adhesive formula. While traditional primers can offer the absolute strongest bond, modern primerless adhesives are incredibly effective and much easier for a DIYer to use correctly, as they remove a whole step from the process.
How long should I wait to drive my car after gluing the mirror back on?
This is a crucial safety question. Most adhesives have two stages: initial set and full cure. The initial set, where the mirror is stable enough to hold its own weight, can be as quick as 5-10 minutes for some products. However, the full cure, where it can handle road vibrations and shocks, takes much longer. I always check the product instructions, but a good rule of thumb is to wait at least 12 to 24 hours before driving the car. If I must drive sooner, I’ll drive very cautiously and avoid bumps or potholes.
Can I use super glue or epoxy to reattach my rear view mirror?
I strongly advise against it. While super glue (cyanoacrylate) is strong, it becomes brittle and doesn’t hold up well to the constant vibrations and temperature changes in a car. It can shatter unexpectedly. Many epoxies also aren’t formulated for the specific surface of automotive glass and can fail. It’s worth using one of the dedicated best adhesives for rear view mirror installation 2025 that are engineered for this exact purpose. They are flexible, temperature-resistant, and designed to bond with treated glass.
My windshield has a dot matrix pattern where the mirror goes. Will adhesive work there?
The dot matrix (the area of black dots) can be tricky because the surface isn’t perfectly flat. Adhesives can struggle to make full contact. Some people sand the dots down slightly, but I don’t recommend that as you risk damaging the windshield. A better method is to use an adhesive designed for this, often a thicker, high-viscosity formula. Another trick I’ve used is to apply a larger button or a small, flexible plastic shim that bridges the dots, providing a flat surface for the adhesive to bond to.
What is the best way to remove old adhesive from my windshield?
Patience is key here. I start by using a plastic razor blade to scrape off the bulk of the old glue, being very careful not to scratch the glass. For the thin, stubborn residue, I apply a small amount of a commercial adhesive remover (safe for auto glass) or even some isopropyl alcohol. I let it sit for a minute to soften the glue and then gently scrape it away with the plastic blade. A final wipe with clean isopropyl alcohol ensures the surface is perfectly clean for the new application.